March 2022 Release (version 1.7.3) - Widgets! Built-in Terminal, Menu, and Built-in Editor Types
March 2022 Release (version 1.7.3)
Script Kit should auto-update or you can grab the downloads here: https://www.scriptkit.com/
Widgets - await widget()
A widget is a detached UI window that can control and listen to a script.
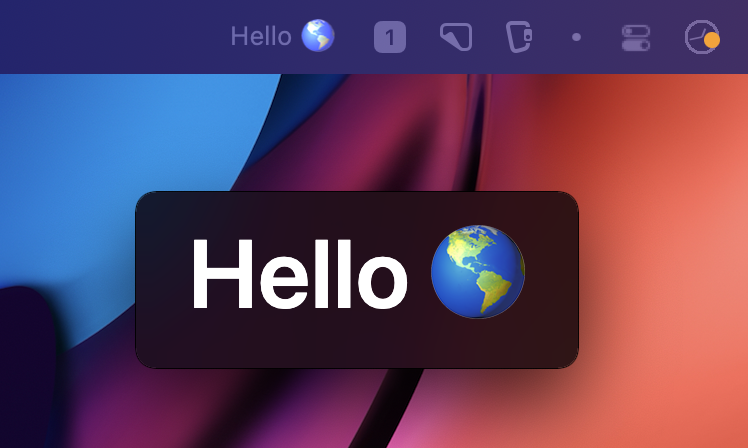
Open widget-hello-world in Script Kit
Widget Events
Open widget-events in Script Kit
Closing a Widget
There are 3 ways to close a widget:
- Hit "escape" with the widget focused
- End the process of the widget. Hit cmd+p with the main menu focused to see the running processes or
exit()anywhere in the script. - Use a
ttl(time to live) in the options when creating a widget
"Always on Top" and Locking the Widget
Open widget-always-on-top in Script Kit
With a widget focused, press cmd+l to "Lock" the widget. This will disable any possible mouse interactions (including moving, resizing, etc) and allow you to click through the widget to any windows underneath.
To "Unlock":
- three-fingered swipe up on OSX
- focus the widget
- hit cmd+l
You can now hit move, escape, etc the widget.
Built-in Terminal - await term()
term is Script Kit's built-in terminal.
From the Main Menu
Type > into the main menu to open term
From a Script
Use the await term() API to switch to the terminal.
Open term-hello-world in Script Kit
Note: If you want spawn a new Mac terminal, use
await terminal()
Pass Terminal Output to Script
If you end the terminal with cmd+enter, the script will continue and you can grab the latest text output from the terminal.
🐞: ctrl+any key will also end the terminal. This is a bug (it was only meant to be ctrl+c) which I'll fix soon. I'm also open to ideas for other shortcuts to "end" a terminal that aren't taken by vim/emacs/etc, because I know I'll be missing some. 🐞:
termdoesn't grab keyboard focus when opening. I'll get that fixed ASAP!
Open term-returns in Script Kit
Menubar - menu()
menu allows you to customize the menubar for Script Kit.

Open menu-hello-world in Script Kit
Menu with Scripts
The second arg of menu can be an array of scripts you wish to present in a drop-down menu. This way, on left-click, you'll get a list of scripts to pick from from the menubar rather than opening the main Script Kit UI.
Open menu-with-scripts in Script Kit
Built-in Editor Types
Script Kit's built-in editor now loads all of Script Kit's types! This was a huge undertaking that everyone just expects to work. You all know how that feels 😇
🐞: Please let me know if you see any missing. I noticed that I missed the types for
terminalanditermwhen putting this post together 🤦♂️.
March Plans
I'm dedicating March to DOCUMENTATION!!! (and bug-fixes)... I have a lot of script requests to follow-up on and work around the newsletter and other non-app stuff. I'm also moving this month, so y'all know how stressful that can be. So expect the April build to be extremely light feature-wise, but I will be set up in the new house ready to much more live-streaming and communication. Can't wait to share more! 🙂
Questions?
I'm happy to help with any questions you may have!
February 2021 (version 1.6.9) - Built-in Editor, New Main Menu Features, `await path()`, Event handlers, Beta pro features, Terminate Process
Been a busy month of major Script Kit features!
Built-in Editor
Script Kit's number one goal is to make writing time-saving scripts easier. So now Script KIt comes with a pre-configured editor, complete with autocompletion and error checking:
If you're already using vs code, you can switch to the "Kit" editor in the Kit tab -> Change Editor.
Main Menu Shortcuts and /, ~, and >
The Script Kit main menu will continue to grow in features.
Shortcuts
cmd+f- Does agrepsearch through all of your scriptscmd+p- Launches aProcessesmenu for currently running scripts
Path Mode
Type the following characters to change the mode of the main menu:
- ~ Switches to a path selector mode in your home directory
- / Switches to a path selector mode in your root directory
Navigate with right/left or tab/shift+tab then select with return. Here's an example of typing ~
Command Mode
- > Switches to a command mode to execute a command
Future Work
In the March release, planning on these:
- , List system preferences
- . App launcher
- ; MEGA MENU WITH EVERYTHING 🤭
await path()
You can now prompt to select a path. This UI works exactly like "path mode" above.
Event Handlers
When building the path prompt, I realized it just wasn't possible to do in a script. So I put in the effort to expose the event handlers from the app into the prompt. So even though path behaves very differently, it's still an arg with customized handlers. You can override many of the handlers yourself for customized prompts:
For example, you can override the default behavior of Escape terminating your current script:
Overriding handlers is definitely considered "advanced", so I'm happy to answer any questions!
Here's a list of all the new arg config properties:
onInputSubmit, onShortcutSubmit
If you want to create "shortcuts" to submit specific values, can use the new onInputSubmit and onShortcutSubmit. These allow you to bind text or shortcuts to submit values. This is exactly how the main menu works:

Beta Pro Features: Menubar
You can now customize the text of the Script Kit menubar icon to say anything with the pro.beta.menubar method. In the future, you'll be able to build out an entire menu, but I thought I'd sneak this feature in for fun in this build:
Open menubar-demo in Script Kit
Terminate Processes
If you need to end a script that's running in the background, stuck on an exec command, or whatever reason, open the main menu with the cmd+; shortcut, then press this button (or hit cmd+p. This will open a "terminate processes" window where you can end your scripts:

Script Kit for Linux - Developer Preview
Script Kit for Linux - Developer Preview
Why "Developer Preview"
- Building from the "Mac" source
Currently, the Linux build builds from the exact same branch as the Mac build. While this works fine, for now, we'll want two separate release cadences and feature sets. This could be done through a branch, but then I'd have to set up a new release server. I'll figure it out details next year.
- The Linux build is missing all the OS-specific tools
Linux currently doesn't support getSelectedText, getTabs, and other utils that are written in AppleScript. I'm planning to tackle many of those utils in Rust, which theoretically should allow them to be cross-platform, but that's another task for next year.
- I've Only Tested on Ubuntu through a Parallels vm
Obviously will need some more real-world testing.
Where to Download
Download the AppImage here: https://github.com/johnlindquist/kitapp/releases/tag/v1.5.1
🥳 Script Kit Launch Day 🎉
Script Kit is Officially Released! 🎉
Download now from https://scriptkit.com
Free Script Kit Course on egghead.io
To help you get started, I put together a short course as a feature tour:
https://egghead.io/courses/script-kit-showcase-for-optimizing-your-everyday-workflows-e20ceab4
If you've been using Script Kit for a while on the beta, you know it can do much, much more than what's shown in the lessons, but everyone has to start somewhere. Speaking of the beta...
Beta Channel Discontinued
If you installed the beta, please download from https://scriptkit.com, quit Kit.app, and replace with the new version. This will put you on the “Main” channel. Updates will be ~monthly. The beta channel is discontinued ❗️
Also, thank you so, so much for all your feedback and patience with updates over the past year. You’ve really helped make Script Kit what it is today and I’m forever grateful 🙏
Windows Developer Preview
The details for the Windows build are found here: https://github.com/johnlindquist/kit/discussions/654
Plans for 2022
- Make the dev setup more contribution-friendly. I would love to accept PRs later next year.
- Get the Windows build to parity with Mac.
- Lots of lessons and scripts. I can finally spend more time sharing scripts than working on the app 😎
- Research into Rust, runtimes, and utilities that can provide any benefit to making our scripts better.
- Focus on "export to serverless function", "export as github action", and other ways to maximize the work you put into your scripts.
- Script Kit Pro. A paid version with additional features not found in the base version. Not ready to talk about it, but it's exciting!
Script Kit for Windows - Developer Preview
Script Kit for Windows - Developer Preview
Why "Developer Preview"
- I haven't bought a certificate to add to the build:
- You'll see many "untrusted" warnings when downloading/installing
- Auto-updating will not work
- I haven't decided if the Windows repo will be a fork, branch, or main
Currently, the Windows build builds from the exact same branch as the Mac build. While this works fine, for now, I'm pretty sure we'll want two separate release cadences and feature sets. This could be done through a branch, but then I'd have to set up a new release server. I'll figure it out the details next year.
- The Windows build is missing all the OS-specific tools
Windows currently doesn't support getSelectedText, getTabs, and other utils that are written in AppleScript. I'm planning to tackle many of those utils in Rust, which theoretically should allow them to be cross-platform, but that's another task for next year.
- I've Only Tested It on Two Laptops
The Mac version has been used/tested by many, many people. I have two Windows laptops at home to test it on. It works well, but I don't know how much your mileage will vary.
Where to Download
Download the installer here: https://github.com/johnlindquist/kitapp/releases/tag/v1.5.1
Again, this build will not auto-update. I'll post announcements here when new versions are available and you'll have to download the new version each time until I have the certificate and release servers worked out. Honestly, I'll probably write a "check for Windows update and download" script then you can just run that on a // Schedule: 0 8 * * * 😉
beta.114 - Info, Settings, Choice Events 🎛
beta.114 - Info, Settings, Choice Events
Displaying Temporary Info
Until now, await div() worked by waiting for the user to hit enter/escape. This still works fine, but if you want to "timeout" a div to display temporary info without user input, this entire script will run without any user interaction:
Remember Selection
I needed to build a settings "panel", so I wanted to make a list that could toggle.

The solution was to remember the previous choice by id. Any time arg is invoked, it will check to see if a choice has an id that matched the previously submitted choice and focus back on it. This enables you to hit enter repeatedly to toggle a choice on and off.
You could also use this when making a sequence of selections:
Choice Events
onNoChoices and onChoices allows Kit.app to tell your script when the user has typed something that filtered out every choice. Most commonly, you'll want to provide a setHint (I almost made it a default), but you can add any logic you want.
beta.98 - Previews 👀, Docs, devTools, updater improvements
Previews
Creating the previews feature was a huge undertaking, but it really paid off. You can now render html into a side pane by simply providing a preview function. A preview can be a simple string all the way to an async function per choice that loads data based on the currently selected choice. For examples, see here #555
You can toggle previews on/off with cmd+p
Docs
Along with previews comes the built-in docs.
- Docs are built from the GitHub discussions docs category
- Each time I post/update a doc, a webhook builds the docs into a json file, Kit.app checks for a new docs.json once a day (or you can manually update them from the
Help->Download Latest Docs - You can click an example to install it! 🎉
- I'll keep working on docs and examples. Please ask any questions over in the docs section if you'd like to see something clarified.
Dev Tools
Pass any data into devTools to pop open a Dev Tools pane so you can interact with the data. devTools will first log out the data, but it's also assigned to an x variable you can interact with in the console.
devToolswill be another paid feature once Script Kit 1.0 releases
Updater Fixes
A few users reported a strange behavior with the updater. If you've had any issues with it, please download a fresh copy of Kit.app from https://scriptkit.com and overwrite the old version. There are many more guards around the updating logic to prevent those issues from cropping up again.
Script Kit online on Stackblitz ⚡️
I spent last week getting Script Kit running "in browser" to emulate the terminal experience over on Stackblitz. Here's a quick demo:
https://stackblitz.com/edit/node-rnrhra?file=scripts%2Frepos-to-markdown.js
The plan is to use this to host interactive demos for the guide/docs. I'd appreciate if you could play around with it a bit and see if I missed anything.
TypeScript support! 🚀
beta.62 brings with it a long-awaited, much-requested feature: TypeScript support!

TypeScript Support 🚀
1. But, how?
Each time your run a TS script, Script Kit will compile the TS script using esbuild to a JS script in a .scripts dir (notice the "dot"). The compiled JS script is then imported from there. Using .scripts as a sibling dir will help avoid any import/path issues. You can also write TS "library" files in your ~/.kenv/lib dir and import them into your script just fine.
If you're experienced with esbuild and curious about the settings, they look like this:
This also opens the door to exporting/building/bundling scripts and libs as individual shippable tools which I'll investigate more in the future.
2. Can I still run my JS scripts if I switch to TS?
Yes! Both your TS and JS scripts will show up in the UI.
3. Why the import "@johnlindquist/kit"?
When you create a new TS script, the generated script will start with the line: import "@johnlindquist/kit"
This is mostly to make your editor stop complaining by forcing it to load the type definition files and forcing it to treat the file as an "es module" so support "top-level await". It's not technically required since it's not technically importing anything, but your editor will certainly complain very loudly if you leave it out.
4. Where is the setting stored?
Look in your ~/.kenv/.env for KIT_MODE=ts.
fs-extra's added to global
The fs-extra methods are now added on the global space. I found myself using outputFile, write/readJson, etc too often and found them to be a great addition. The only one missing is copy since we're already using that to "copy to clipboard". You can bring it in with the normal import/alias process if needed, e.g., let {copy:fsCopy} = await import("fs-extra")
Sync Path

You may notice running scripts from the Script Kit app that some commands you can run in your terminal might be missing, like "yarn", etc.
Run the following command in your terminal to copy the $PATH var from your terminal to your ~/.kenv/.env. This will help "sync" up which commands are available between your terminal and running scripts from the app.
Scripts in GitHub actions (preview)
tl;dr Here's an example repo
The example script creates a release, downloads an image, and uploads it to the release.
https://github.com/johnlindquist/kit-action-example
Template Repo
This page has a "one-click" clone so you can add/play with your own script.
https://github.com/johnlindquist/kit-action-template
What is it?
Use any of your scripts in a GitHub action. use the kit-action and point it to a scripts in your scripts dir:
Add env vars:
You most likely add "secrets" to GitHub actions, so you'll want to pass them to your scripts as environment variables:
Works with your existing repos
Feel free to add this action and a scripts dir to your existing repos. It automatically loads in your repo so you can parse package.json, compress assets, or whatever it is you're looking to add to your CI.
What does "preview" mean?
Everything is working, but it's pointing to the "main" branch rather than a tagged version. Once I get some feedback, I'll tag a "1.0" version so you can uses: @johlindquist/kit-action@v1
Please ask for help! 😇
I'd ❤️ to help you script something for a github action! Please let me know whatever I can do to help.
beta.55 Improved Search, Drag, and Happiness 😊
Search Improvements
beta.55 has a vastly improved search:
Search descriptions 🎉

Search shortcuts

Search by kenv

Sear by "command-name" (if you can't think of // Menu: name)

Sorts by "score" (rather than alphabetically)
Drag
Choices can now take a drag property. This will make list items "draggable" and allow you to drag/drop to copy files from your machine (or even from URLs!) into any app. When using remote URLs, their will be a bit of "delay" while the file downloads (depending on the file size) between "drag start" and "drop enabled", so just be aware. I'll add some sort of download progress indicator sometime in the future, just not high priority 😅

You can use the drag object syntax to define a format and data
text/html: Renders the HTML payload in contentEditable elements and rich text (WYSIWYG) editors like Google Docs, Microsoft Word, and others.text/plain: Sets the value of input elements, content of code editors, and the fallback from text/html.text/uri-list: Navigates to the URL when dropping on the URL bar or browser page. A URL shortcut will be created when dropping on a directory or the desktop.

Happiness
I'm very happy with the state of Script Kit. When I started almost a year ago, I had no idea I could push the concept of creating/sharing/managing custom scripts so far. I think it looks great, feels speedy, and is flexible enough to handle so, so many scenarios.
With everything in place, next week I'm starting on creating lessons, demos, and docs. It's time to show you what Script Kit can really do 😉
P.S. - Thanks for all the beta-testing and feedback. It's been tremendously helpful!
beta.46 Design, ⚐ Flags, div, fixed notify
Design/theme
Put a lot of work into tightening up pixels and made progress towards custom themes:

Here's a silly demo of me playing with theme generation:
Flags ⚐
An astute observer would notice that the Edit and Share tabs are now gone. They've been consolidated into a "flag menu".
When you press the right key from the main menu of script, the flag menu now opens up. This shows the selected script and gives you some options. It also exposes the keyboard shortcuts associated with those options that you can use to :

I've found I use cmd+o and cmd+n all the time to tweak scripts of quickly create a new one to play around with.
Custom Flags
You can pass your own custom flags like so:
Notice that flag is a global while flags is an object you pass to arg. This is to help keep it consistent with terminal usage:
From the terminal
Will set the global flag.open to true

You could also run this and pass in all the args:
In the app, you could create a second script to pass flags to the first with. This is required if you need to pass multiple flags since the arg helper can only "submit" one per arg.
I'll put together some more demos soon. There are plenty of existing CLI tools out there using flags heavily, so lots of inspiration to pull from.
await div()
There's a new div "component". You can pass in arbitrary HTML. This works well with the md() helper which generates html from markdown.
Fixed notify
notify is now fixed so that it doesn't open a prompt
The most basic usage is:
notify leverages https://www.npmjs.com/package/node-notifier
So the entire API should be available. Here's an example of using the "type inside a notification":
beta.33 `console.log` component, cmd+o to Open, `className`
console.log Component
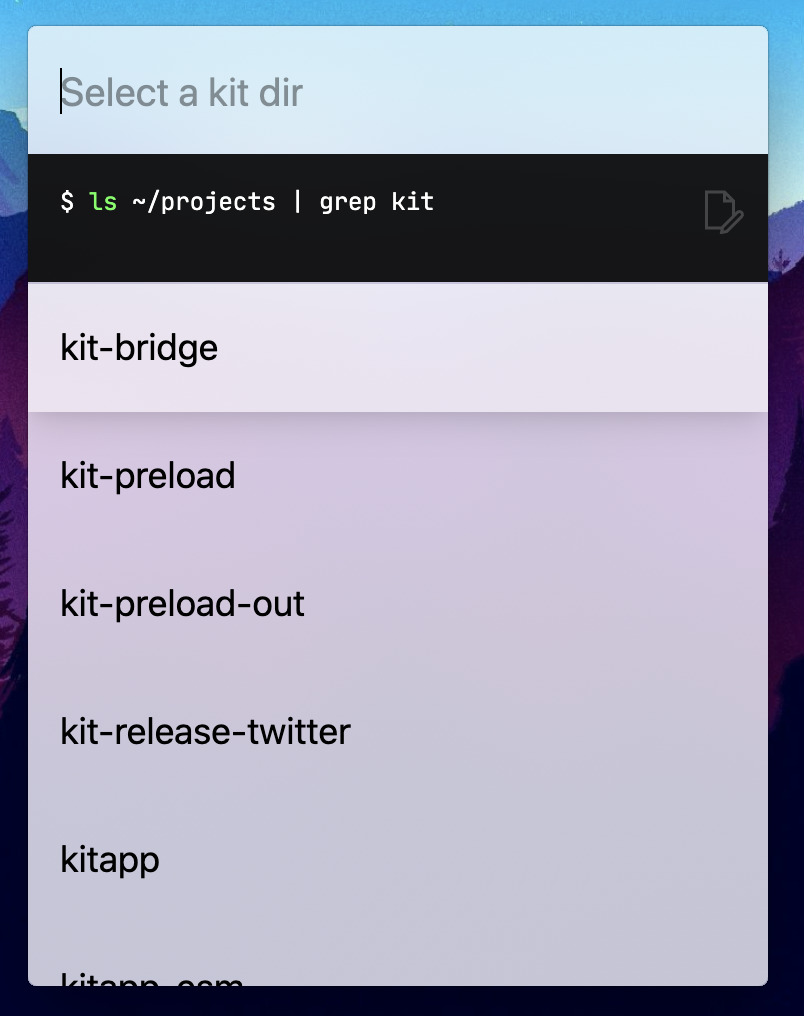
The follow code will create the below prompt (👀 notice the black background logging component):
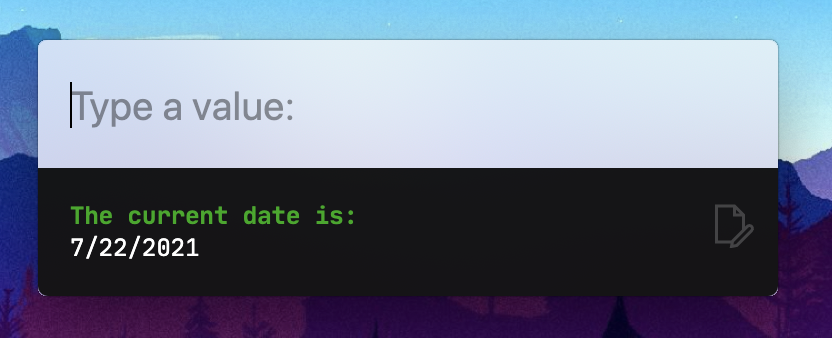
The log even persists between prompts:
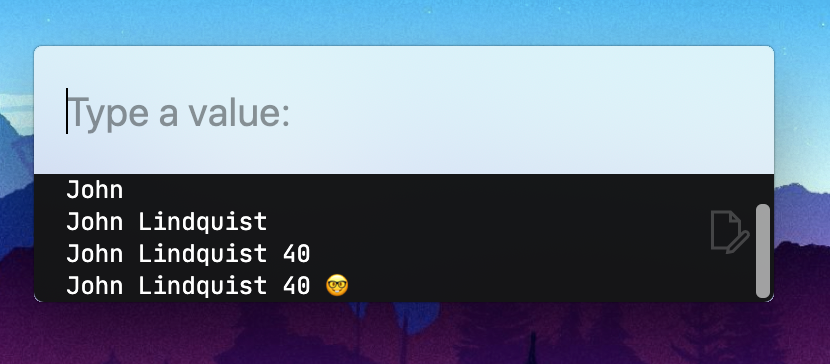
Click the "edit" icon to open the full log in your editor:

cmd+o to Open
From the main menu, hitting cmd+o will open:
- The currently selected script from the main menu
- The currently running script
- Any "choice" that provides a "filePath" prop:
I've found this really useful when I want to tweak the running script, but I don't want to go back through the process of finding it.
Experimental className
You can pass className into the arg options to affect the container for the list items or panel. Most classes from Tailwind should be available. Feel free to play around with it and let me know how it goes 😇:
beta.29 M1 build, install remote kenvs, polish, upcoming lessons
I'm starting on lessons/docs on Monday. If you have anything specific you want me to cover, please reply below!
M1 Build
If you're on an M1 mac, you can download the new M1 build from https://www.scriptkit.com/
- Download https://www.scriptkit.com/
- Quit Kit. *note - typing
kit quitork qin the app is the fastest way to quit. - Drag/drop to overwrite your previous build
- Kit should now auto-update from the M1 channel
- Open Kit
Kenv Management
There are a lot of tools to help manage other kenvs. They're in the Kit menu and once you've installed a remote kenv (which is really just a git repo with a scripts dir), then more options show up in the Edit menu to move scripts between kenvs, etc. I'll cover this in detail in the docs/lessons
Polish
Lots of UI work:
- Remembering position - Each script with a
//Shortcutwill remember its last individual prompt position. For example, if you have a script that usestextarea, then drag it to the upper right, the next time you launch that script, it will launch in that position. //Imagemetadata - Scripts can now have images:
or
will load from ~/.kenv/assets/logo.png
- Spinner - added a spinner for when you submit a prompt and the process needs to do some work before opening the next prompt

- Resizing - Lots of work on getting window resizing behavior consistent between different UIs. This was a huge pain, but you'll probably never appreciate it 😅
- Lots more - many more small things
Lessons!
I'm starting to work on lessons next week and getting back into streaming schedule. I would ♥️ to hear any specific questions or lessons you would like to see to help you remove some friction from your day. I'll be posting the lessons over on egghead.io for your viewing pleasure. Please ask questions in the replies!
Beta.20 MOAR SPEED! ⚡️
Process Pools and Virtualized Lists
Experimental textarea
Feel free to play around with the textarea for multiline input.
The API of textarea will change (it currently just sets the placeholder), but it will always return the string value of the textarea, so there won't be any breaking changes if you just keep the default behavior. cmd+s submits. cmd+w cancels.
Experimental editor (this will become a paid 💵 feature later this year)
As an upgrade to textarea, await editor() will give you a full editor experience. Same as the textarea, the API will also change, but will always return a string of the content.
⚠️ API is subject to change!
A note on paid features
Everything you've used so far in the Script Kit app will stay free. The core kit is open-source MIT.
The paid features will be add-ons to the core experience: Themes, Editor, Widgets, Screenshots, Record Audio, and many more fun ideas. These will roll out experimentally in the free version first then move exclusively to the paid version. Expect the paid versions later this year.
Beta.19 New Features - Gotta go fast! 🏎💨
Beta.19 is all about speed! I've finally landed on an approach I love to get the prompt moving waaaay faster.
Couple videos below:
Instant Prompts
Instant Tabs
Instant Main Menu
The main menu now also leverages the concepts behind Instant Prompts listed above.
Faster in the future
These conventions laid the groundwork for caching prompt data, but I still have plenty ideas to speed things, especially around how the app launches the process. I'm looking forward to making this even faster for you!
I'm also starting the work on an "Instant Textarea" because I know popping open a little textarea to take/save notes/ideas is something many people would use. 📝
How to Get Your Scripts Featured on ScriptKit.com 😎
TL;DR
- Help -> Create kenv
- Git init new kenv, push to github
- Reply, dm, contact me somehow with the repo 😇
Here's a video walking you through it:
Beta.18 Changes/Features (`db` has a breaking change)
⚠️Breaking: New db helper
lowdb updated to 2.0, so I updated the db helper to support it.
- access/mutate the objects in the db directly. Then
.write()to save your changes to the file. await db()andawait myDb.write()
Example with a simple object:
You can also use an async function to store the initial data:
Text Area prompt

Optional value
arg choice objects used to require a value. Now if you don't provide a value, it will simply return the entire object:
⚗️ Experimental "Multiple kenvs"
There was a ton 🏋️♀️ of internal work over the past couple weeks to get this working. The "big idea" is supporting multiple kit environments. For example:
- private/personal kenv
- shared kenv
- company kenv
- product kenv
Future plans
In an upcoming release:
- you'll be able to "click to install kenv from repo" (just like we do with individual scripts)
- update a git-controlled kenv (like a company kenv)
- the main prompt will be able to search for all scripts across kenvs.
- If multiple kenvs exist, creating a new script will ask you which kenv to create it in.
For now, you can try adding/creating/switching the help menu. It should all work fine, but will be waaaay cooler in the future 😎

Improved Error Prompt
Now when an error occurs, it takes the error data, shuts down the script, then prompts you on what to do. For example, trying to use the old db would result in this:

Improved Tab Switching
Switching tabs will now cancel the previous tabs' script. Previously, if you quickly switched tabs on the main menu, the "Hot" tab results might show up in a different tab because the loaded after the tab switched. The internals around message passing between the script and the app now have a cancellation mechanism so you only get the latest result that matches the prompt/tab. (This was also a ton of internals refactoring work 😅)
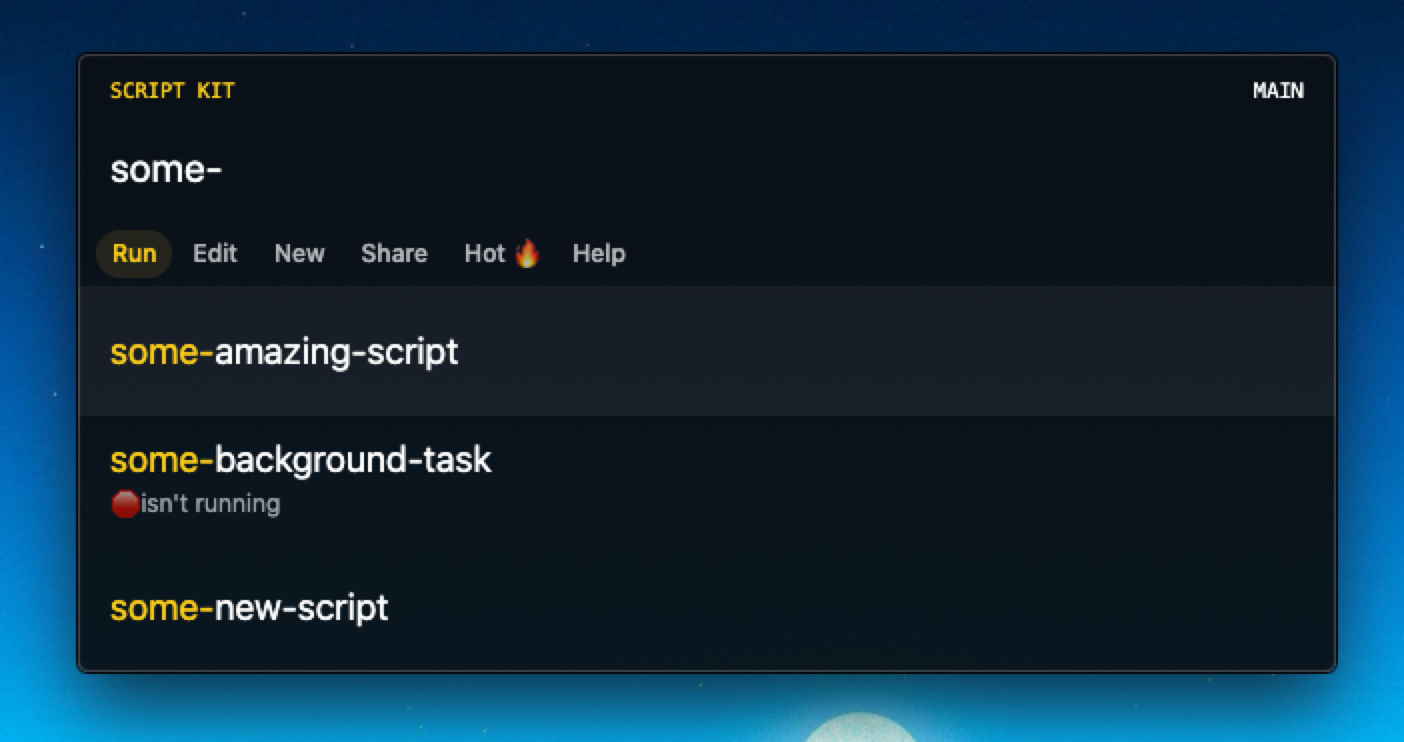
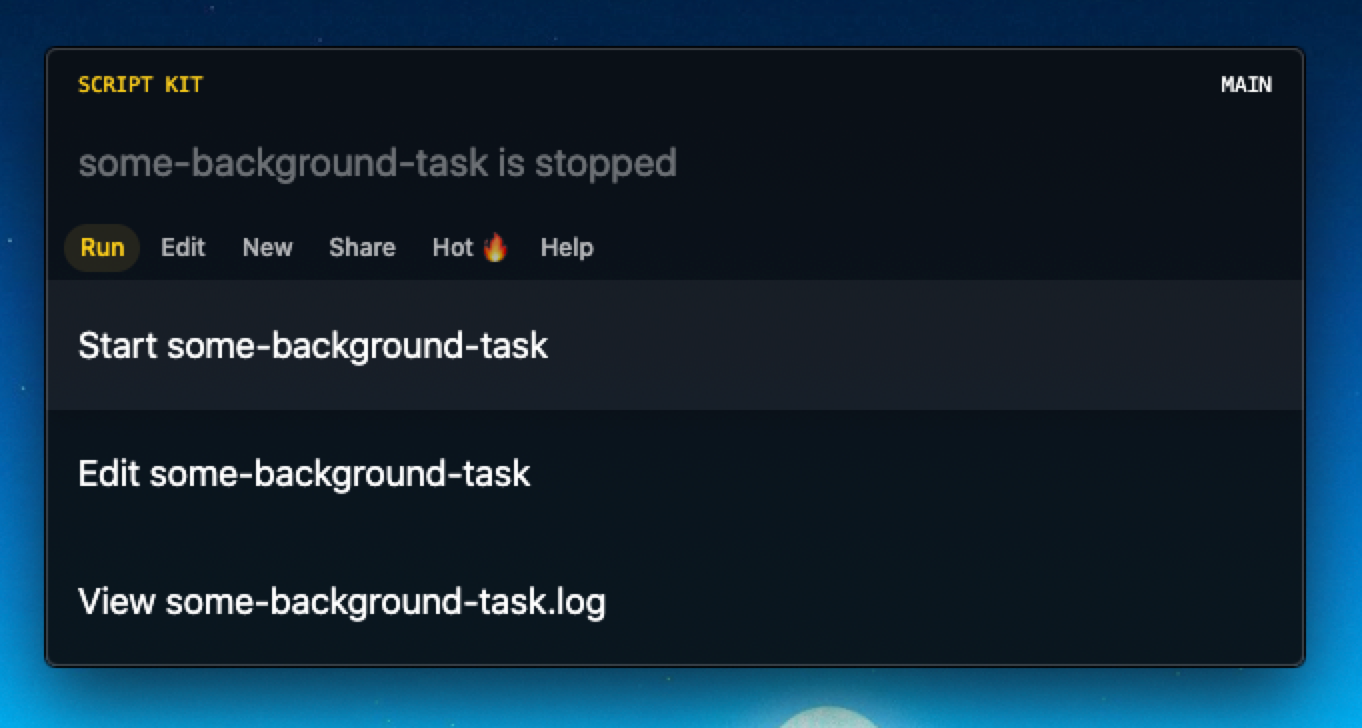
✨ NEW ✨ // Background: true
beta.12 brings in the ability to start/stop background tasks.
Using // Background :true at the top of your script will change the behavior in the main menu:
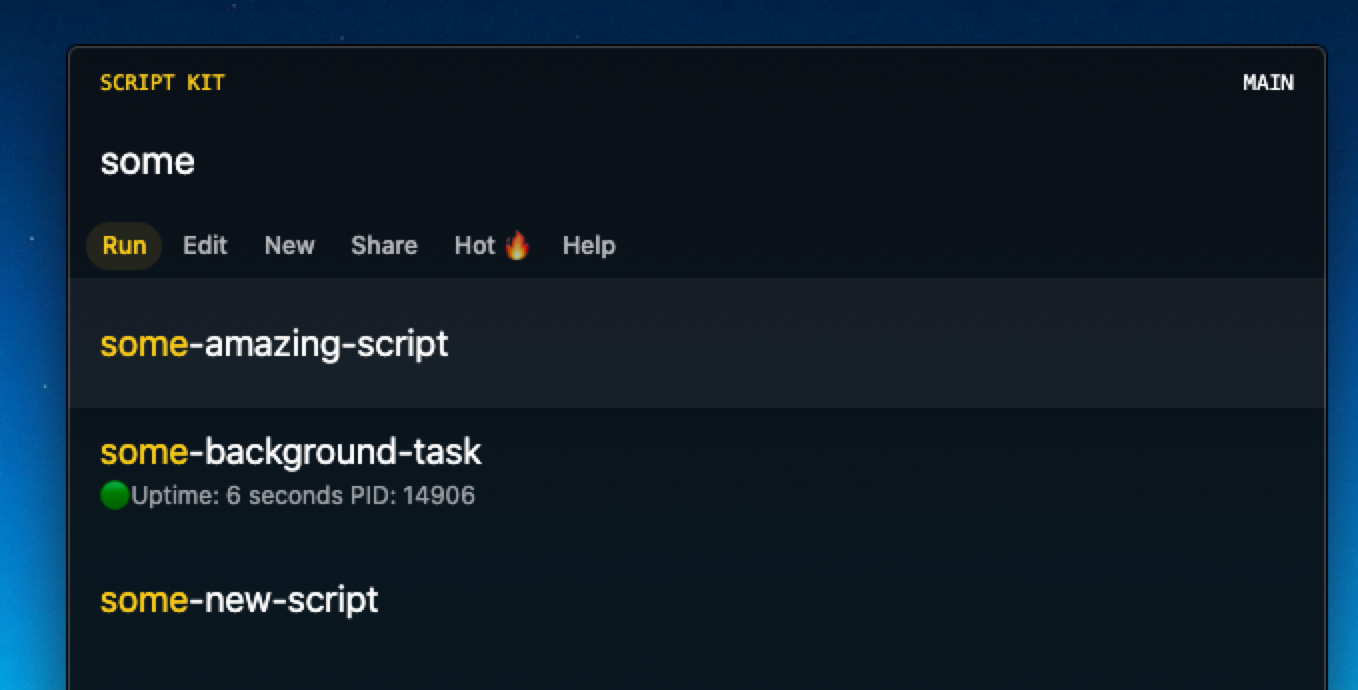
Auto (like nodemon)
Using auto, after you start the script, editing will stop/restart the script.
// Watch: metadata 👀
Script Kit now supports // Watch: metadata
// Watch:supports any file name, glob, or array (Kit willJSON.parsethe array).- Scripts will run on the "change" event
- Read more about supported globbing
Read about the other metadata
I would LOVE to hear about scenarios you would use this for or if you run into any issues 🙏
beta.96 - Design, Drop, and Hotkeys! Oh my!
Can't wait to see what you build! Happy Scripting this weekend! 😇
Types are here!
Update (1.1.0-beta.86) adds a ~/.kit/kit.d.ts to allow better code hinting and completion.
❗️After updating, you will need to manually "link" your ~/.kenv to your ~/.kit for the benefits (This will happen automatically for new users during install)
Method 1 - Install and run this script
Method 2 - In your terminal
Now your scripts in your ~/.kenv/scripts should have completion/hinting for globals included in the "preloaded" scripts.
I still need to add types for the helpers that load scripts from dirs
kit(),cli(), etc.
Please let me know how it goes and if you have any questions. Thanks!